Adding and editing name table entries manually
To enter the name table entry manually:
1. On the menu, click .
2. Do one of the following:
• Click . The Insert Name dialog appears.
• Select the entry you wish to edit and click . The Edit Name dialog appears.
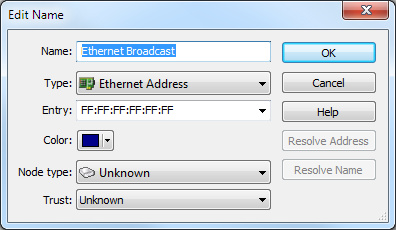
3. Complete the dialog. The Node type options let you choose an icon representing this entry, including Workstation, Server, Router, Switch, Repeater, Printer, or Access Point.
NOTE: Click on this dialog to learn more about available options and settings.
5. Click to add the entry to the Name Table.
NOTE: Symbolic names assigned to protocols in the Name Table will not override names provided by ProtoSpecs. See ProtoSpecs™.